

Key Takeaways
Why Fluid Checks Belong in Every Driver's Routine
Fluids are the lifeblood of your vehicle's mechanical systems. Engine oil lubricates moving metal parts, coolant prevents overheating, and brake fluid transmits the hydraulic force that stops your car. When any of these drop below the safe range - or degrade in quality - damage can follow quickly and quietly. The good news is that checking them takes under 20 minutes and requires no mechanical training.
Building this habit fits naturally into a broader seasonal car maintenance checklist, and it gives you the knowledge to have more informed conversations with any shop you do visit. Understanding what happens to engine oil as it ages also reinforces why timely checks matter beyond just topping things off.
What you will need
What You'll Need Before You Start
Gather a few simple items before lifting the hood. You don't need a toolbox - just the basics listed below. Your owner's manual is the single most important resource: it identifies each reservoir's exact location, the correct fluid specification, and any vehicle-specific cautions that generic advice can't account for.
Owner's Manual
Identifies the exact location of each reservoir and the correct fluid specification for your vehicle.
Lint-Free Rag or Paper Towels
Used to wipe dipsticks clean before taking a reading and to catch any drips.
Flashlight or Work Light
Illuminates the engine bay so you can clearly see reservoir markings and fluid color.
Nitrile Gloves
Protects your hands from brake fluid (a skin irritant) and engine grime.
Keep a Simple Maintenance Log
A small notebook or a notes app entry with the date, mileage, and fluid status for each check takes 60 seconds to complete and pays dividends at the shop. Technicians often ask when fluids were last checked, and a dated record removes the guesswork entirely.
Step-by-Step: Reading Each Fluid
Work through each fluid systematically rather than skipping around. Consistent order helps you avoid missing a reservoir and keeps your inspection log easy to follow. If any reading concerns you - a fluid is far below the minimum, looks unusual, or you can't locate a reservoir - that's a valid reason to consult a qualified mechanic rather than guess.
Park on a level surface and let the engine cool
Pull onto flat ground and turn the engine off. For most fluids - especially engine oil and coolant - you need the engine cold or fully warmed up according to the specific check. A good default is to wait at least 30 minutes after driving. Hot engines and pressurized cooling systems can cause burns if opened too soon.
Open the hood and locate your fluid reservoirs
Pull the interior hood release lever (usually near the driver's left knee), then release the secondary safety latch at the front of the hood. Prop the hood open with the support rod. Consult your owner's manual for a labeled diagram of the engine bay - reservoir positions vary considerably between makes and models. Look for color-coded caps (yellow for oil dipstick, orange for transmission, and similar conventions) as a quick orientation guide.
Check the engine oil level and condition
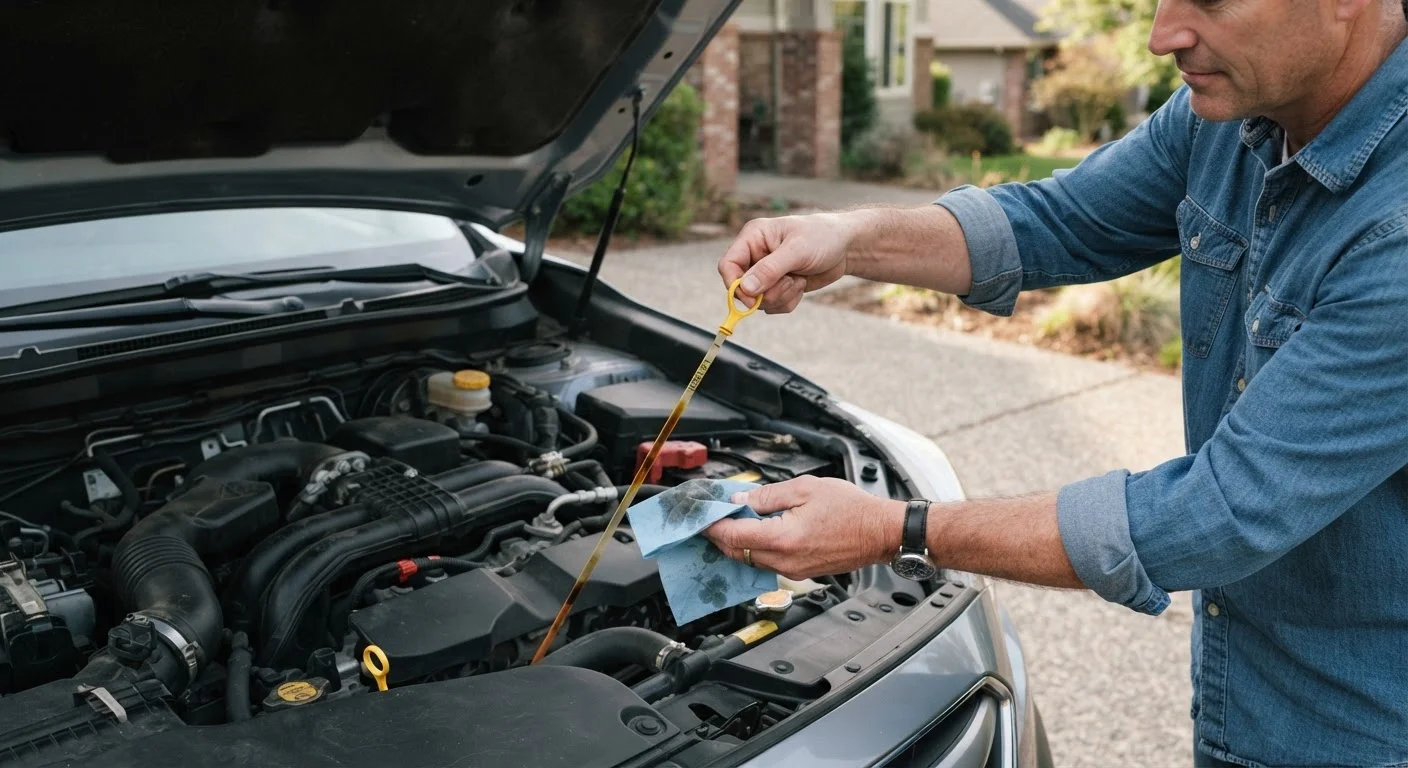
Pull the oil dipstick (usually marked with a bright ring or handle), wipe it clean with your rag, reinsert it fully, then withdraw it again. The oil level should fall between the two marks - often labeled MIN and MAX or indicated by cross-hatching. Note the color: new oil is amber; dark brown or black oil is old and ready for a change; milky or foamy oil may signal coolant contamination and warrants prompt attention from a mechanic.
Check the coolant (antifreeze) level
Locate the translucent plastic coolant reservoir - usually labeled with a temperature or radiator icon. With the engine cold, check that the fluid level sits between the LOW and FULL marks visible on the outside of the reservoir. Coolant should appear bright green, orange, or pink depending on type; cloudy or rusty-looking coolant may need flushing. Do not open the pressurized radiator cap on a hot engine.
Inspect brake fluid, power steering fluid, and transmission fluid
Brake fluid: The brake fluid reservoir is typically a small translucent container near the firewall on the driver's side. Check the level against the MIN/MAX markings on the outside. Brake fluid should be clear to light yellow; dark fluid or a noticeably low level should be discussed with a mechanic, as either can affect braking performance.
Power steering fluid: Many newer vehicles use electric power steering and have no fluid reservoir. If yours has one, it looks similar to the brake fluid reservoir. Check the dipstick or external markings as directed in your manual.
Transmission fluid: Some vehicles have a transmission dipstick; others are sealed and require a shop check. If your vehicle has a dipstick, the procedure mirrors engine oil - wipe, reinsert, read. Fluid should be red to pink and smell slightly sweet, not burnt.
Top off windshield washer fluid and record your findings
Washer fluid is the one reservoir you can safely open and refill yourself without mechanical concern. Use a premixed washer fluid rated for your climate - plain water can freeze in winter. After completing all checks, jot down the date, your odometer reading, and any fluid that was low or discolored. This log is invaluable when talking to a technician or following a scheduled maintenance plan.
Never Mix Fluid Types
Using the wrong coolant type or brake fluid specification can damage seals and degrade system performance. Always consult your owner's manual for the exact specification before adding any fluid - generic substitutions are not always interchangeable, even if they look identical.
When a Fluid Reading Should Send You to a Shop
Not every abnormal reading is a crisis, but some combinations of symptoms warrant professional attention rather than a simple top-off. Rapidly recurring low levels, unusual colors, burnt smells, or fluid that looks contaminated are all signals that something mechanical may be wrong upstream. A dashboard warning light appearing alongside a low-fluid reading adds urgency - our guide on what warning lights actually mean can help you interpret those signals.
For a broader view of which maintenance tasks are reasonable to handle yourself and which belong in a professional bay, see our article on DIY car maintenance vs. taking it to a shop. Checking fluids is squarely in the DIY column - adding or replacing them may or may not be, depending on the system involved.
Brake Fluid Drops Deserve a Second Look
A steadily dropping brake fluid level is not always a leak - it can reflect normal brake pad wear as the caliper pistons extend further. However, a sudden or significant drop should be evaluated by a qualified mechanic before the vehicle is driven extensively. Do not ignore it or simply top off without understanding the cause.