

Key Takeaways
Why Paper Maps Still Matter
Smartphone GPS apps have made trail navigation feel effortless — until a canyon wall kills your signal, a battery dies mid-route, or a software update corrupts your offline maps. Electronic navigation tools are genuinely useful, but they are not fail-safe. A printed topographic (topo) map and a baseplate compass require no power, no network, and no satellites. They work in any weather, at any altitude, and on any terrain.
Topo maps represent the three-dimensional landscape of trails, peaks, drainages, and slopes in a two-dimensional format using contour lines — the curved lines that make a topo map visually distinctive. Learning to read them transforms a confusing paper grid into an accurate mental model of the terrain ahead. Combined with a compass, a topo map gives you the tools to establish your position, plan a route, and navigate confidently even when technology fails.
This skill matters most — and is least practiced — by the hikers who need it most. Solo travelers, backcountry campers, and anyone venturing into remote terrain should treat map-and-compass proficiency as a non-negotiable baseline. For a fuller picture of what solo trail travel demands, see the honest trade-offs of solo hiking.
USGS 7.5-Minute Topographic Map
Provides detailed elevation data, contour lines, water features, and trail routes at a 1:24,000 scale — the standard for backcountry hiking in the US.
Baseplate Compass
Used to orient the map to magnetic north, shoot bearings toward landmarks, and follow a direction of travel in the field.
Pencil and Notepad
Useful for recording bearings, sketching terrain features, or marking your last known position.
Map Case or Zip-Lock Bag
Protects the paper map from moisture, rain, and perspiration — a wet map tears easily and becomes unreadable.
Getting Started: What You'll Need
Effective land navigation requires the right materials and a foundational understanding of how topo maps are structured. Before hitting the trail, gather your equipment and familiarize yourself with the map's layout at home.
What you will need
Practice Before You Need It
Land navigation is a perishable skill. Reading a topo map confidently under pressure requires repetition in low-stakes settings first. Practice orienting a map, shooting bearings, and identifying terrain features on trails you already know before applying these techniques in remote or unfamiliar terrain. Overconfidence in untested navigation skills is a common contributor to trail emergencies.
Step-by-Step: Reading and Navigating with a Topo Map
Work through these steps in sequence. The first three are preparation steps you should complete before leaving the trailhead; the final three apply in the field when you need to find or confirm your position.
Orient Your Map to the Ground
Before you try to read any terrain feature, rotate your map so north on the map aligns with magnetic north using your compass. This single habit eliminates most beginner confusion about which direction trails or ridgelines run. Re-orient every time you change direction or stop to assess your surroundings.
Understand the Map's Scale and Contour Interval
Before reading any terrain detail, locate two key pieces of information printed in the map's legend: the scale and the contour interval. The scale tells you how distance on the map corresponds to real-world distance — a 1:24,000 scale means one inch on the map equals 24,000 inches (2,000 feet) on the ground. The contour interval tells you how much elevation change each contour line represents, commonly 40 feet on USGS 7.5-minute maps. Thicker index contours are labeled with their elevation; thinner intermediate contours fall between them.
Read Contour Lines to Visualize Terrain Shape
Contour lines connect points of equal elevation. Learning to read their patterns is the core skill of topo map navigation:
- Closely spaced lines indicate steep terrain — cliffs, bluffs, or aggressive ridges.
- Widely spaced lines indicate gentle slopes or flat ground.
- V-shapes pointing uphill indicate valleys, drainages, or stream gullies.
- V-shapes pointing downhill indicate ridges or spurs extending from high ground.
- Closed oval or circular lines indicate a hilltop or summit — a small tick mark on the inner line denotes a depression.
Mentally convert these two-dimensional patterns into the three-dimensional landscape around you before you start moving.
Orient Your Map Using a Compass
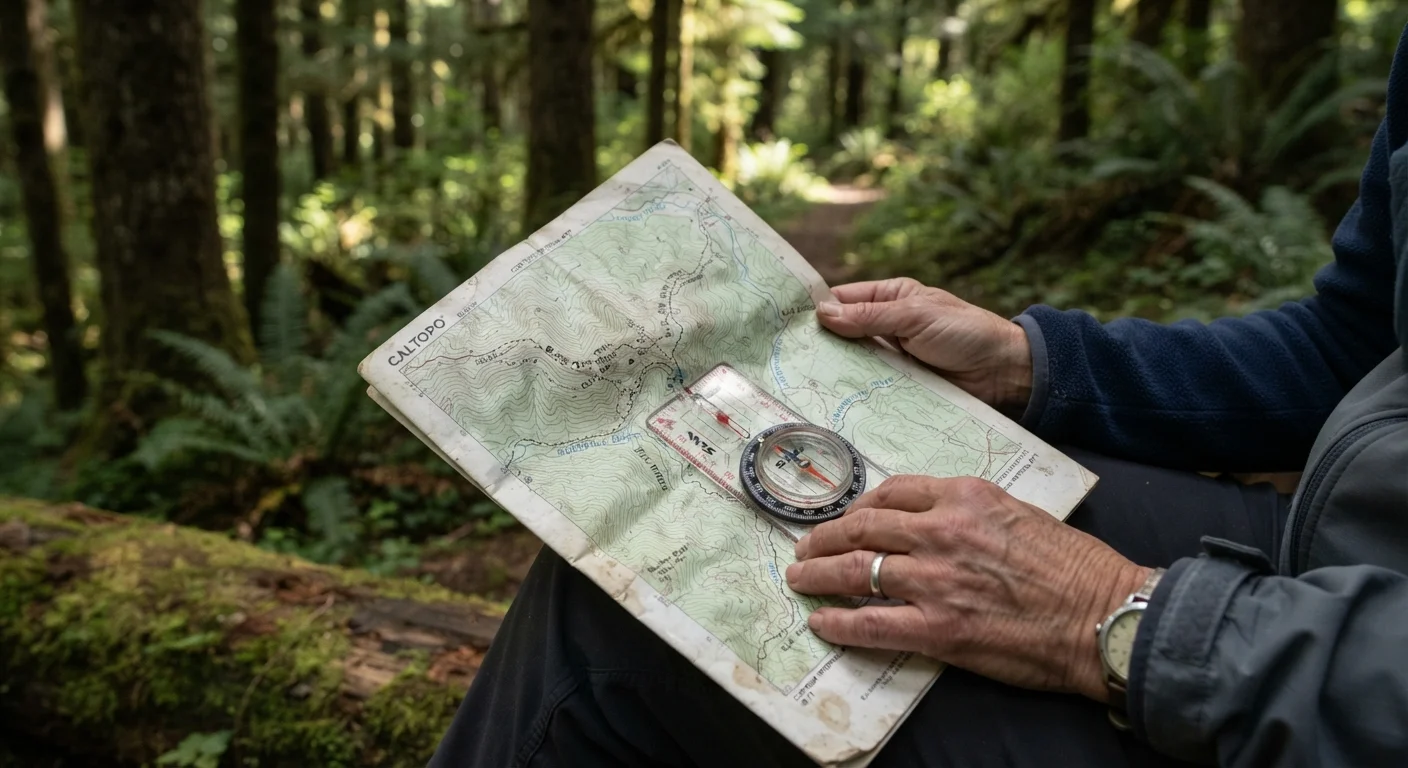
Place your compass on the map with the long edge aligned with a north-south grid line. Rotate the map and compass together until the compass needle aligns with the north arrow in the bezel. Your map is now oriented to magnetic north — the terrain features depicted on paper should mirror what you see in front of you. Declination (the difference between true north and magnetic north) matters in long-distance navigation; check the map's legend for your region's declination value and adjust your compass bezel if needed.
Identify Your Location by Terrain Association
Look around and identify two or three distinct terrain features you can see — a ridgeline, a valley, a lake, a prominent peak. Find those same features on your oriented map. Your position is somewhere consistent with your relationship to all of them simultaneously. Ask yourself: Am I north or south of that ridge? Is that drainage to my left or right? This technique, called terrain association, is often faster and more intuitive than formal triangulation for trail hiking.
Triangulate Your Position with Compass Bearings
When terrain association alone isn't enough, use triangulation. Identify a recognizable landmark visible from where you stand and also marked on the map — a summit, a lake outlet, a distinct knoll. Point your compass at the landmark and read the bearing from the rotating bezel. Draw a line on the map from that landmark back toward you along that bearing. Repeat with a second landmark at least 60° away. Where the two lines intersect is your approximate position. A third bearing improves accuracy significantly.
Plan and Follow a Route to Your Destination
With your position established, trace your intended route on the map before moving. Note prominent terrain features you should encounter along the way — stream crossings, saddles, elevation gains — and use them as checkpoints to confirm you're on track. Count ridgelines and drainages as you cross them. If a feature you expect doesn't appear, stop and reassess rather than continuing deeper into uncertainty. Consistent map-checking every 20 to 30 minutes of travel prevents small errors from compounding into serious ones.
For additional context on how poor pre-trip planning contributes to navigation failures, see our guide on common trip-planning missteps.
Building and Maintaining Your Navigation Skills
Map reading is a skill that fades without use. The most effective way to build confidence is deliberate practice on familiar terrain — bring your topo map on trails you already know well and navigate by map alone, verifying your decisions as you go. Over time, reading contour patterns and matching them to visible terrain becomes intuitive rather than effortful.
Navigation is also just one component of trail preparedness. Pair it with sound planning habits: tell someone your route and expected return time, carry adequate water and emergency gear, and understand how seasonal conditions affect the terrain you're traveling through. Our evidence-backed trail safety habits covers the broader set of behaviors that meaningfully reduce risk on any outing.
Never Rely Solely on Digital Navigation
GPS devices and smartphone apps can fail due to dead batteries, software crashes, or loss of signal in deep canyons and dense forest. Always carry a printed topo map and compass as a backup — and know how to use them before you need them. See our trail-ready safety checklist for a full rundown of navigation essentials to pack.